Cloudflare API Token Setup Guide
Configure a scoped Cloudflare API token for Æxyr
10 Steps • ~5 Minutes • Cloudflare Free Plan CompatibleOverview
This guide walks through creating a scoped Cloudflare API token with the exact permissions required by Æxyr for automated SSL certificate provisioning, DNS management, and Cloudflare Tunnel integration.
Required Token Permissions
| Scope | Resource | Permission |
|---|---|---|
| Account | Cloudflare Tunnel | Edit |
| Zone | Zone Settings | Read |
| Zone | DNS | Edit |
Scope the token to your specific zone for security best practice.
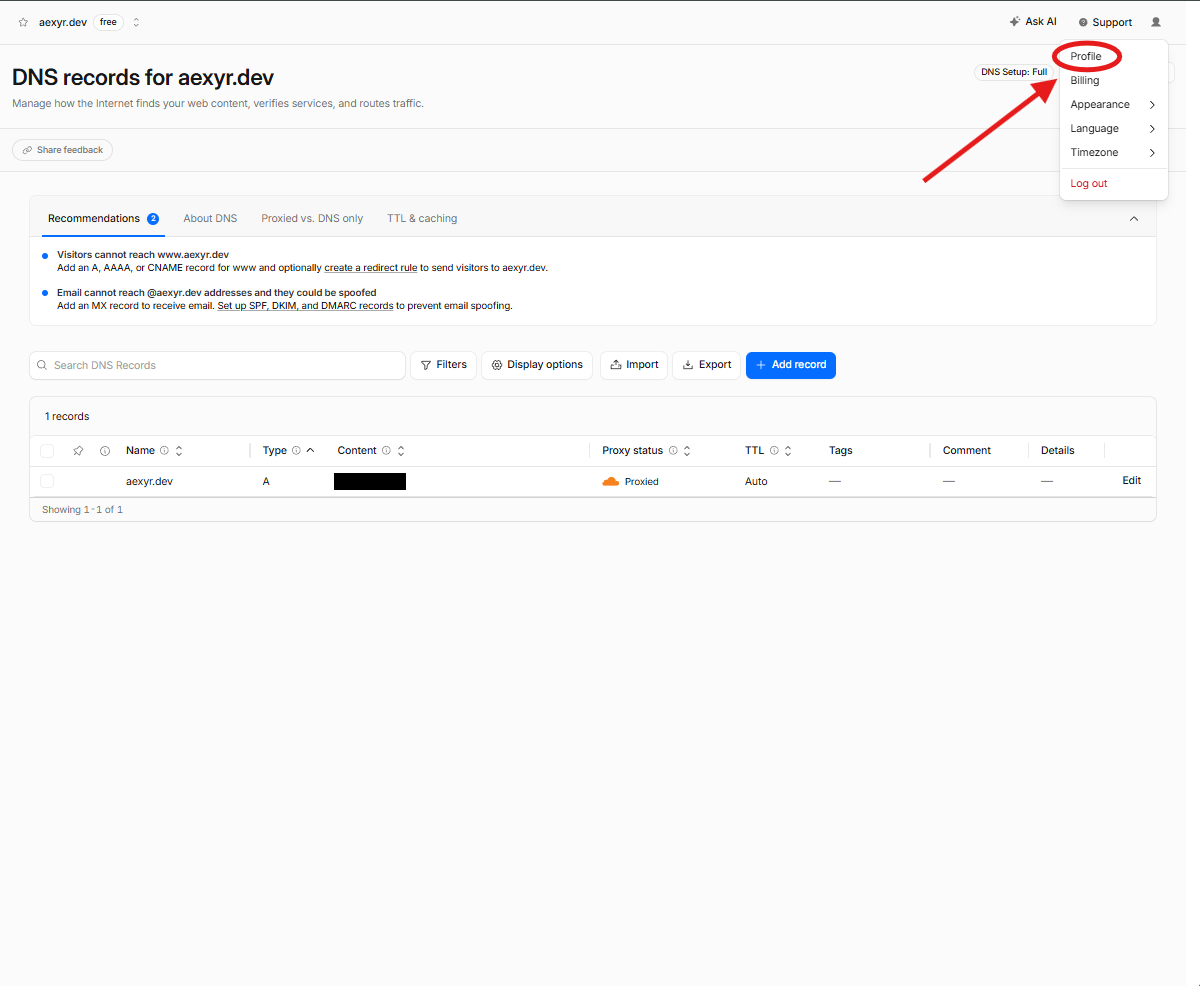
1 Navigate to Profile
From the Cloudflare dashboard, click your profile icon in the top-right corner and select Profile from the dropdown menu.
2 Open API Tokens
In the left sidebar of your Profile page, click on API Tokens to access the token management interface.

3 Create Token
Click the + Create Token button in the top-right to begin creating a new scoped API token.

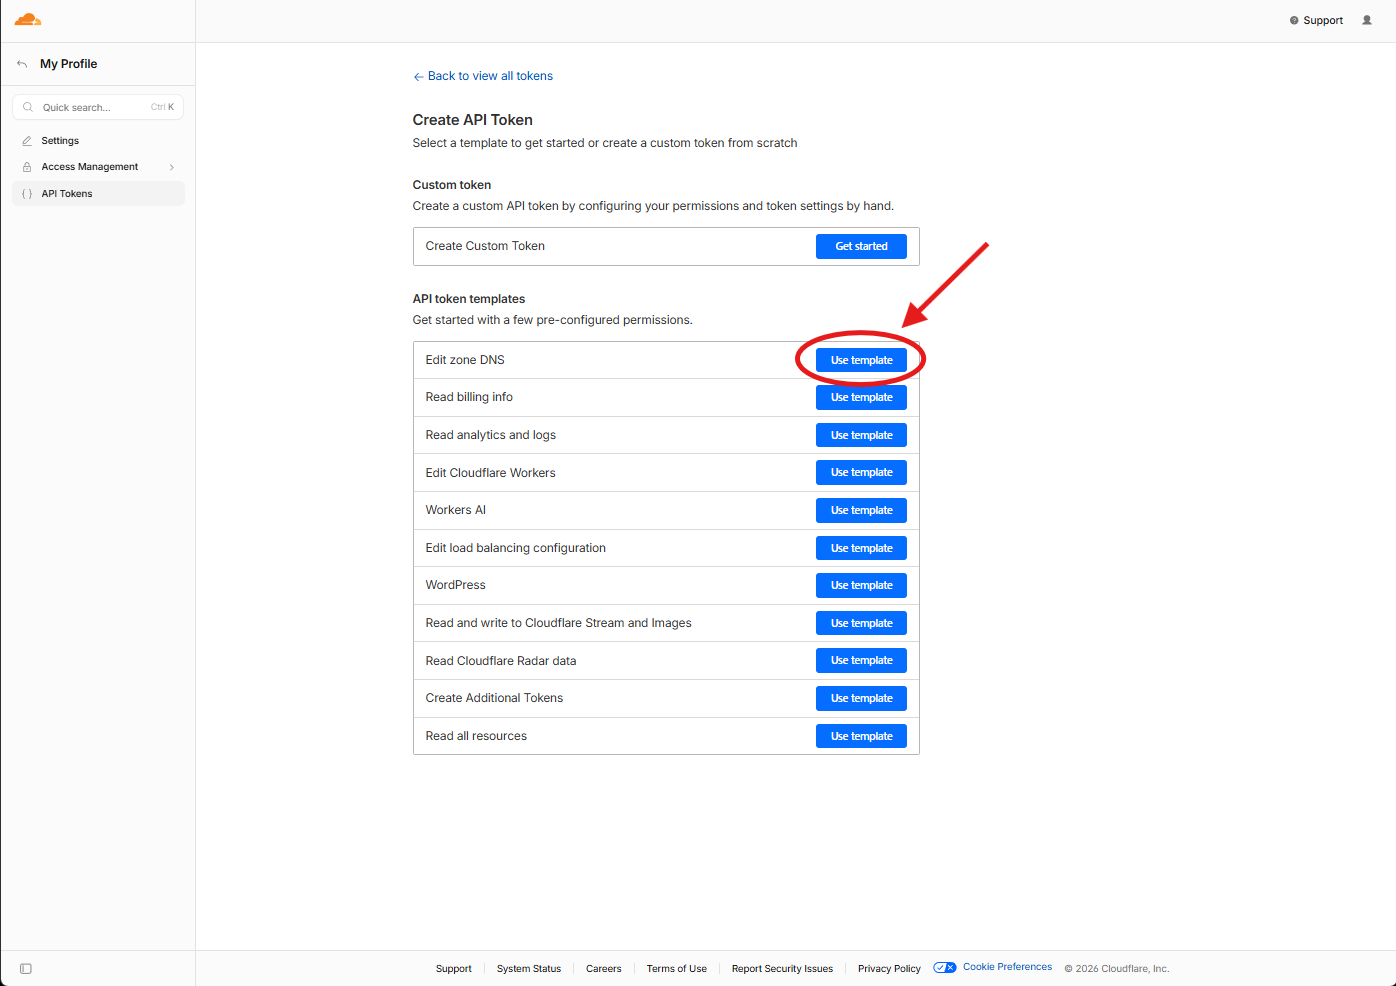
4 Select Edit Zone DNS Template
From the API token templates list, find Edit zone DNS and click Use template. This provides the base DNS editing permissions needed by Æxyr.
5 Add Required Permissions
Click + Add more under Permissions to add the additional permission rows that Æxyr requires beyond basic DNS editing.
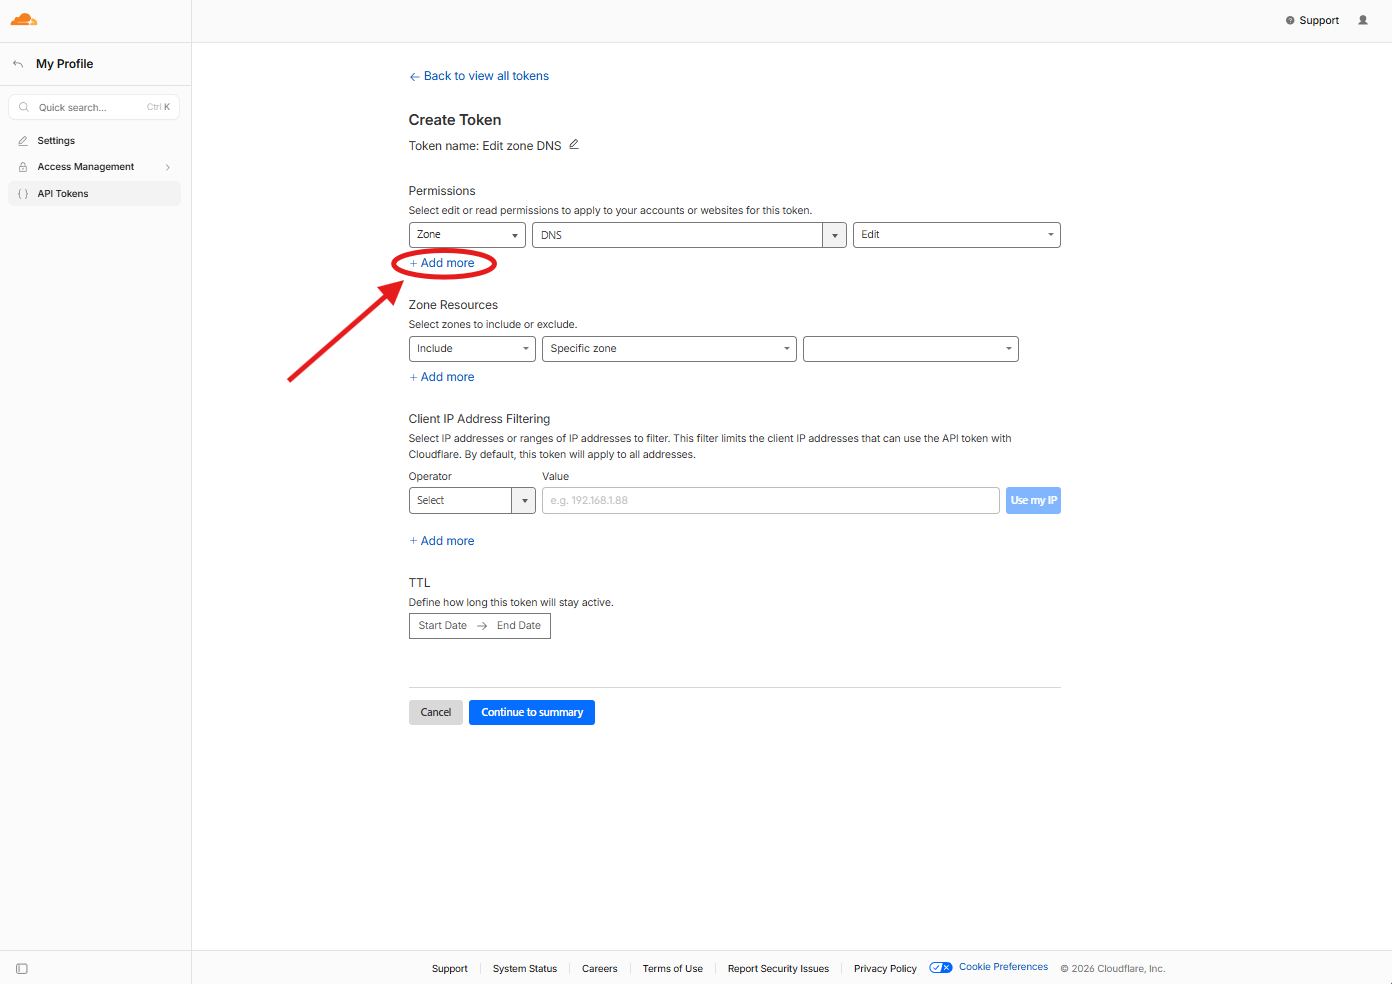
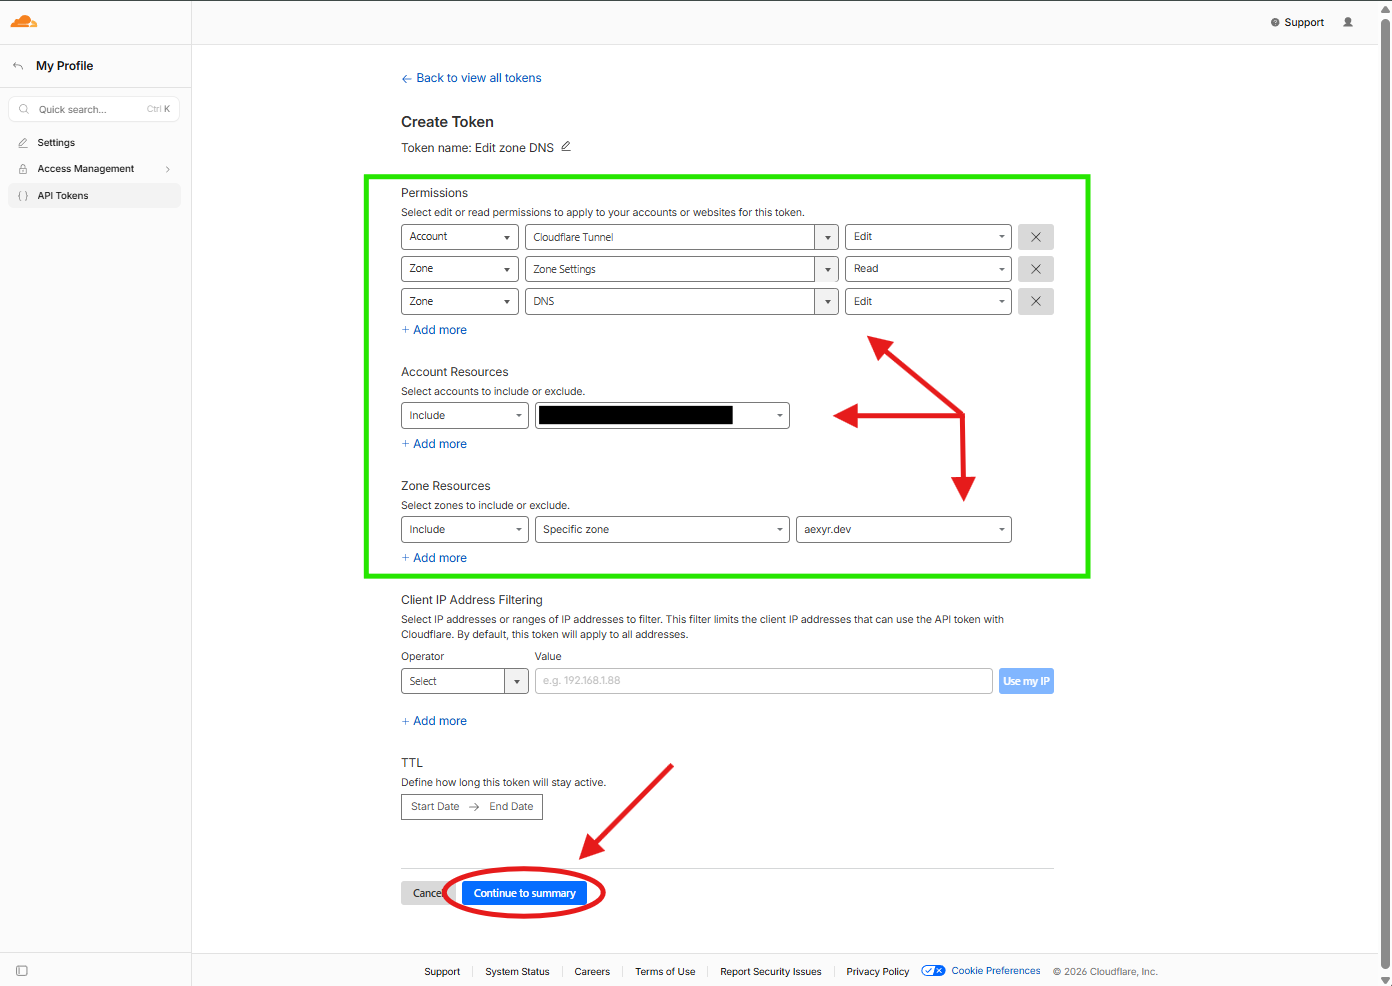
6 Configure Token Permissions
Configure three permissions:
- Account > Cloudflare Tunnel > Edit
- Zone > Zone Settings > Read
- Zone > DNS > Edit
Set Zone Resources to Include > Specific zone > your domain. Then select your Account. Click Continue to summary.
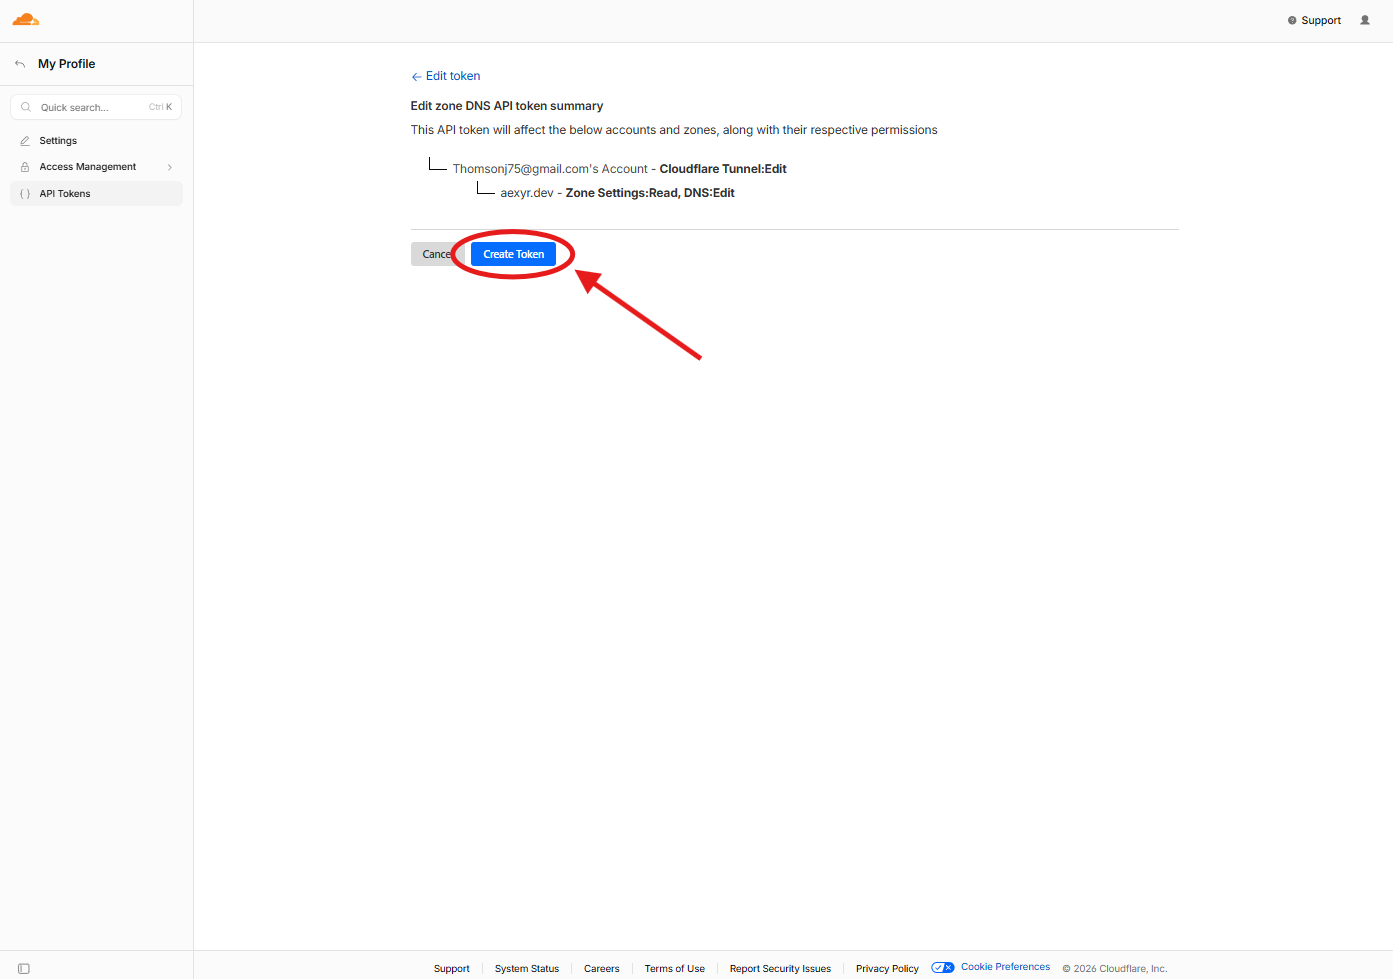
7 Review & Create Token
Review the token summary to confirm permissions are correct: Cloudflare Tunnel:Edit at the account level, and Zone Settings:Read + DNS:Edit for your specific zone. Click Create Token.
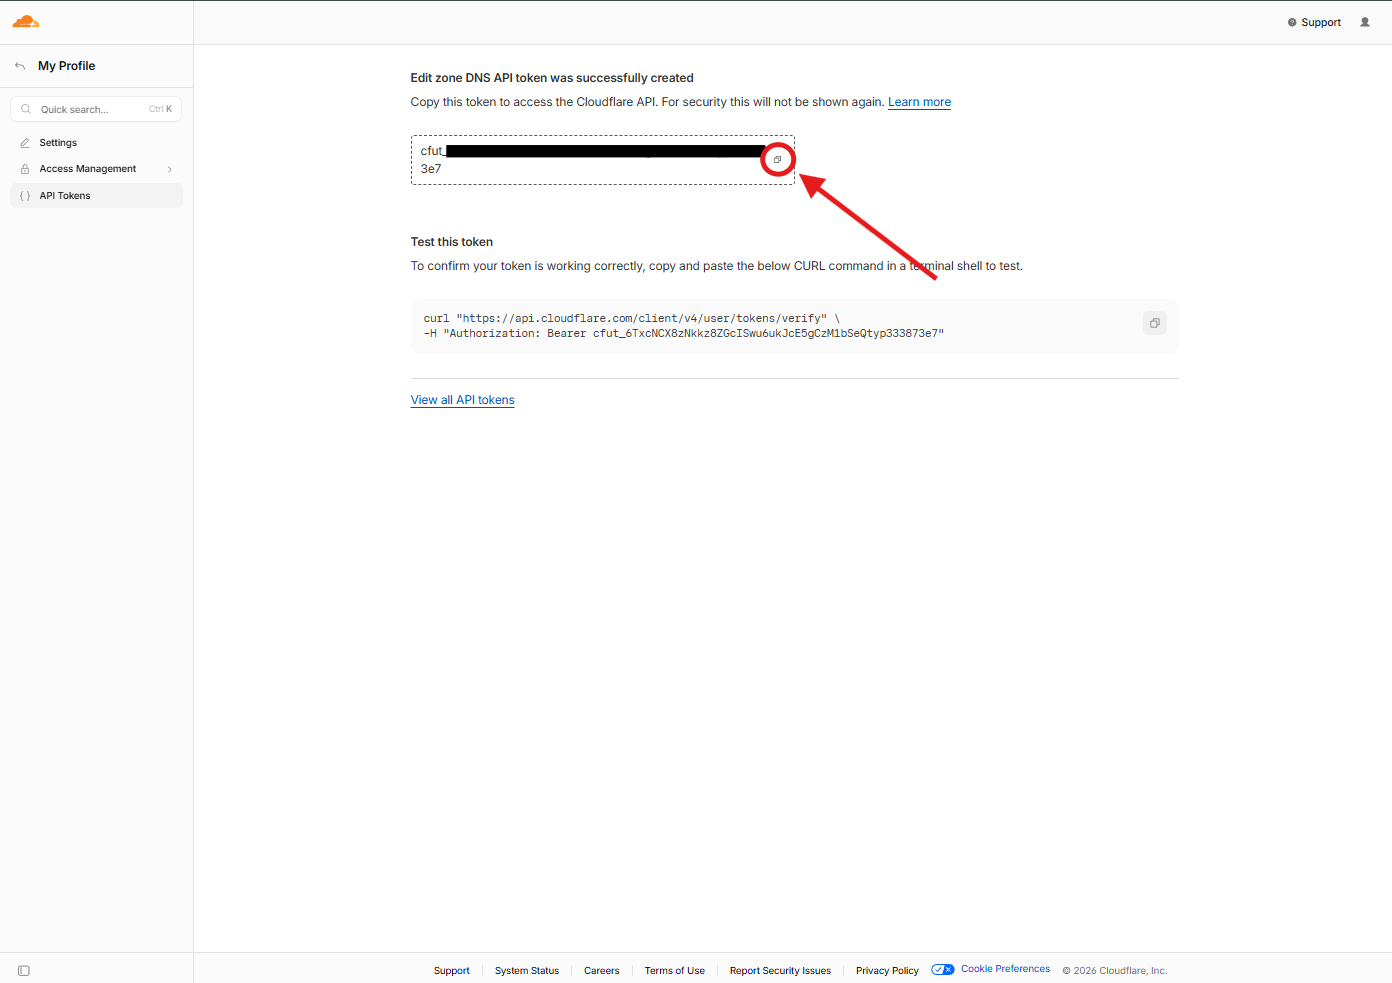
8 Copy Your API Token
Your token is displayed once. Copy it immediately using the copy icon. This token will not be shown again. You can verify it works using the provided curl command.
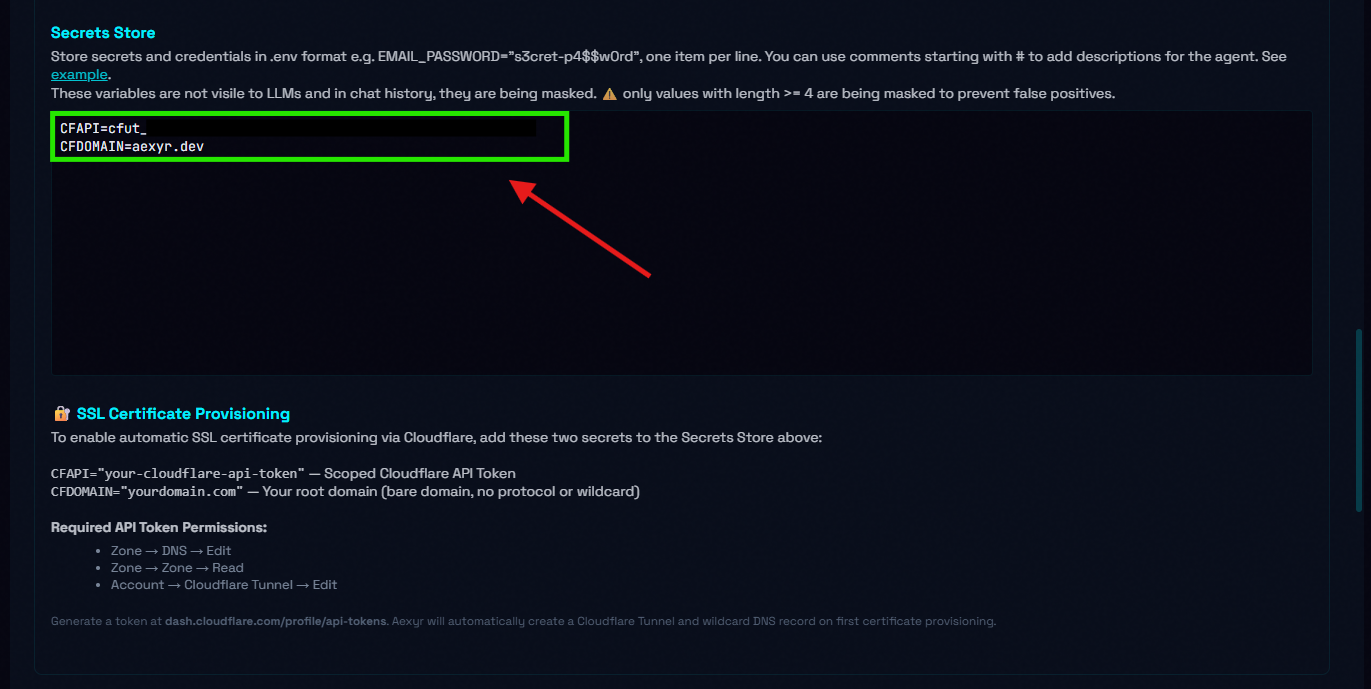
9 Store Token in Æxyr
Open the Æxyr Secrets Store and add two entries:
- CFAPI="your-copied-token"
- CFDOMAIN="yourdomain.com"
Æxyr will automatically use these for SSL certificate provisioning and DNS management.
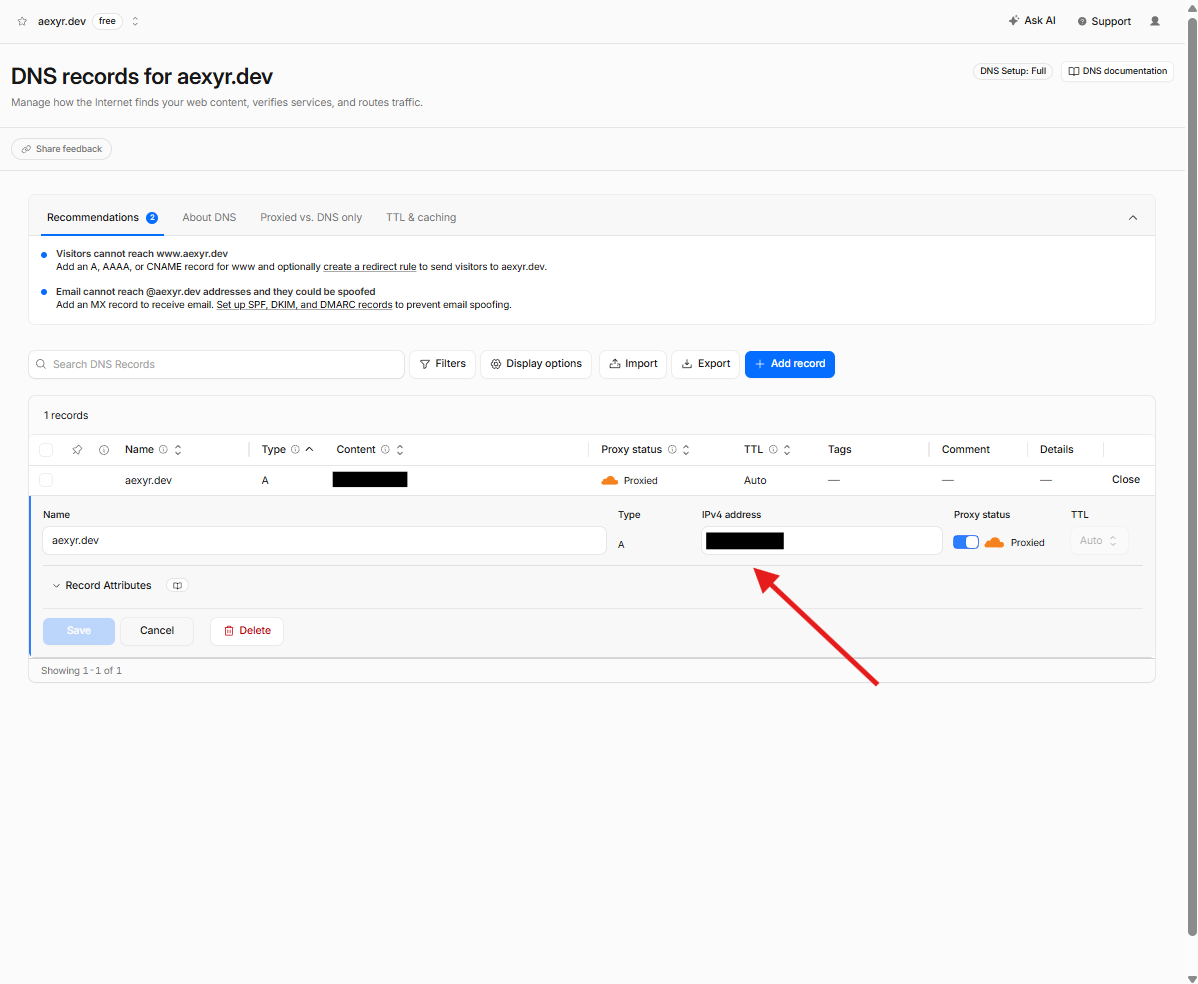
10 (Optional) Access Æxyr UI From Internet
Optionally, you can access the Æxyr UI directly from the internet. In your Cloudflare DNS settings, ensure your A record points to your server’s IP address with Proxy status enabled. This allows you to reach the Æxyr interface via your domain from any browser.